The work of a Salesforce admin is difficult. You’re tasked with keeping a complicated, nuanced system running as smoothly as possible, even while requirements change around you. It takes a particular skill set — and the right tech tools — to keep everything in order.
In a previous blog, we listed 5 free Salesforce admin tools that can help save hours each week. After seeing the positive response to that article, we decided to dive back in — to offer you even more tricks that’ll make your life easier.
But this isn’t any old sequel. Here, we’re featuring 5 completely different free Salesforce tools that are just as impactful as the others we’ve mentioned before. When used correctly, they’re bound to cure countless headaches, improve your ability to troubleshoot problems and make you invaluable in the eyes of your company.
5 Life-Saving Salesforce Features
1. Route all Salesforce error emails to the right people.
By default, when Salesforce experiences an error with a Process or Flow, it sends the error email to the person who built the offending automation. For teams just getting started with Salesforce and only one admin, this system might make sense. But what if an implementation partner built that automation? Or a former admin who’s no longer with the company? In those cases, Salesforce is sending the error email out into the void, to a deactivated user or someone no longer with your company.
Instead, we recommend this little trick: Send all of your Process and Flow error emails to your “Apex Exception Email Recipients.” In the Setup menu, go to “Process Automation Settings.” Near the bottom of the page, you’ll see an option to adjust where Salesforce sends these notifications.
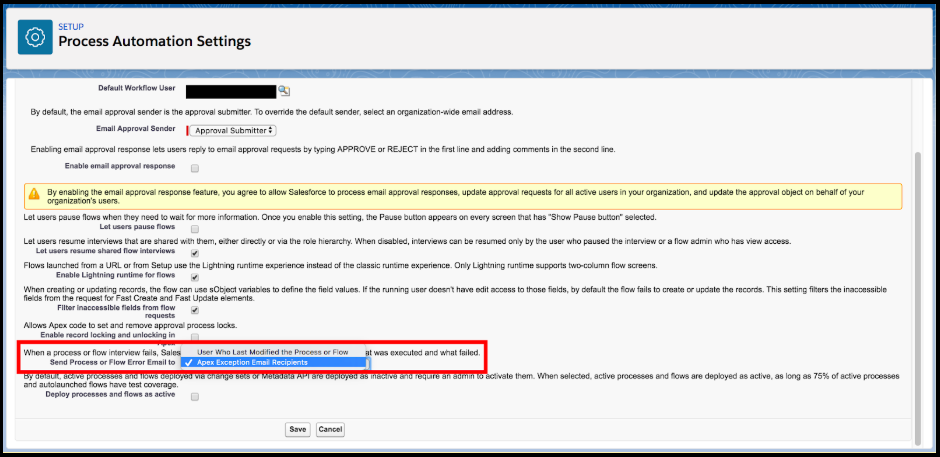
Now that you’ve done that, let’s set those email recipients. While still in Setup, go to the “Apex Exception Email” node. There you can configure multiple users and external email addresses to receive those error emails. Once you’ve done that, any error email related to Apex code, Processes or Flows will go to the list you’ve set. This list is also much easier to maintain — you can easily add new admins and remove old ones as your team changes.

2. Log in as another user (without ending up logged out yourself).
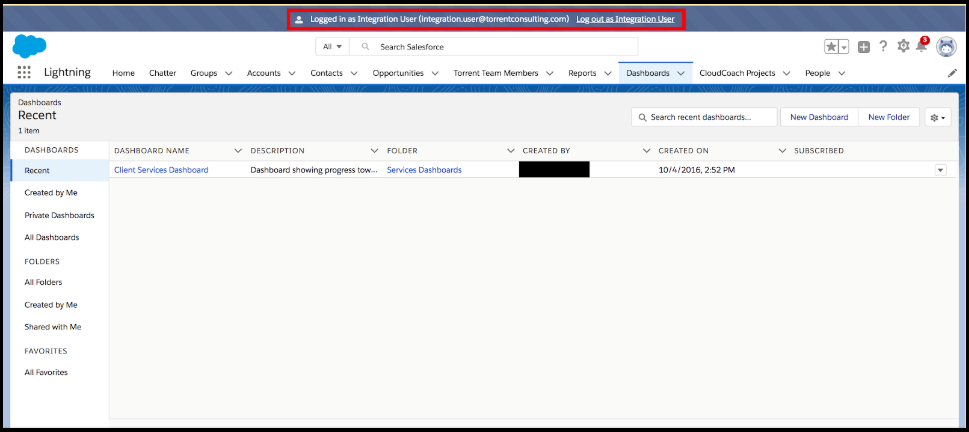
As an admin, you can see practically everything in your org. If you have the right Salesforce security settings in place, though, your users can’t. So, a lot of support questions you get might relate to this kind of security: They can’t see or edit the records, reports or dashboards they want to. As an admin, it’s difficult to troubleshoot these user-specific issues unless you test side-by-side with them.
Or, Salesforce allows another option: You can log in as the user in need of support. To enable this setting, go to “Login Access Policies” in the Setup menu and check the box that says “Administrators Can Log in as Any User” (if you can’t do so, contact Salesforce support and ask them for assistance). Next, go to the “Users” node in Setup and press the “Login” link next to the name of the affected user. Then you can test any issue through their eyes, to help you get to the bottom of it. Heads up, though: Depending on your org’s security settings, you might need to follow two-factor authentication to log in as another user. See this page for considerations around this feature.


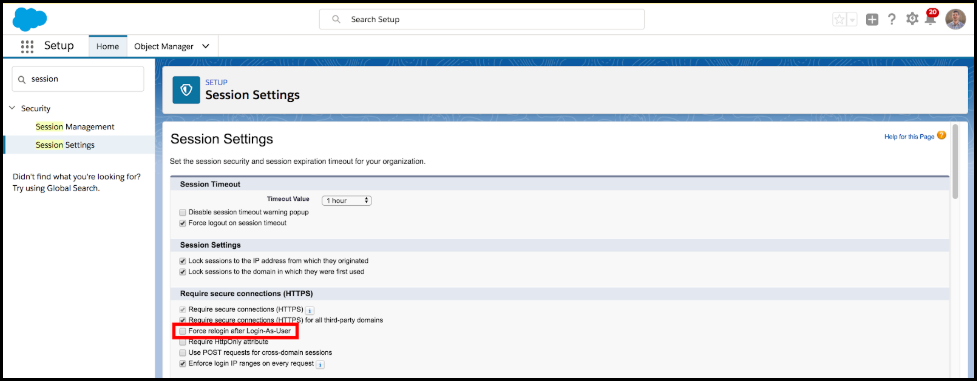
If you already knew about this feature, here’s a bonus tip: If you get logged out of Salesforce every time you log in as a different user and then exit their viewpoint, there’s a fix for that, too! Go to “Session Settings” and make sure the checkbox labeled “Force relogin after Login-As-User” is unchecked. That way, every time you log in as a different user and then log out from their viewpoint, you’ll still be logged in as your admin account. With this setting, you can test the same functionality as multiple users much more quickly — no need to re-login every time you need to see something as someone else.
3. Audit the email sent from Salesforce.
Many users and admins alike get a lot of use out of Salesforce’s email functionality, whether they’re using it to send templated emails out of the platform manually or automatically. But especially for those automated emails, there’s not much visibility into messages once they’re delivered. You might not know if you’re in danger of hitting Salesforce email limits. That lack of reporting can also be concerning when sending emails to customers, clients or partners.
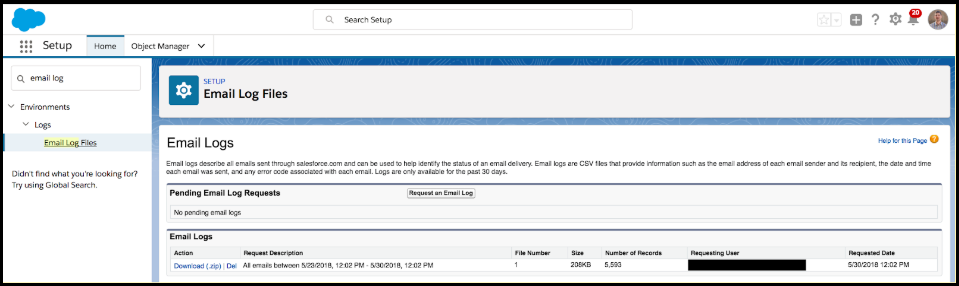
Salesforce has you covered here, too, though. Just request an Email Log to see the latest email activity: who sent the email, who it went to, when it happened and more. To do so, go to “Email Log Files” in the Setup menu. Then “Request an Email Log” at the top of the page. You can see, at most, seven days worth of emails but can filter it to a more specific time or even specific email addresses. If you’re worried that an email went to the wrong email address or wasn’t delivered, this audit tool will help you figure that out.
4. Run the Optimizer Report
As an admin, new or experienced, it can be difficult to know if your org is set up “properly.” Is your team following best practices? Are you in danger of hitting any Salesforce limits? Are there any unnecessary fields, reports or page layouts you can get rid of?
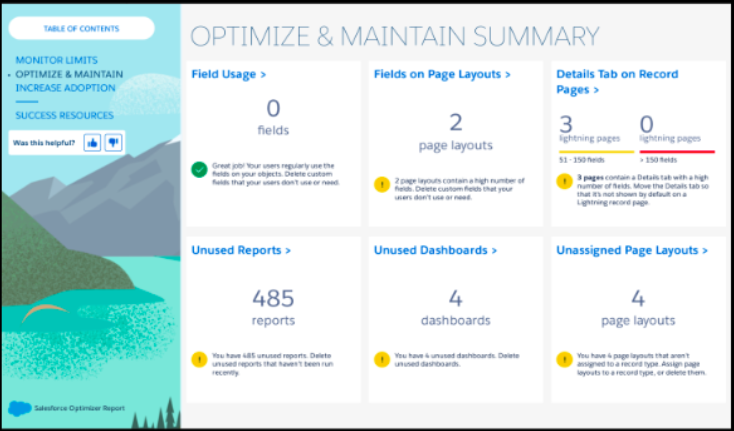
Salesforce’s free Optimizer report (new in the Winter ‘19 release) can give you the answers to those questions. Go to the “Optimizer” node in Setup and run the report. Salesforce will send you a PDF with pages of useful information: what percentage of users have logged in recently, where you might hit limits, how many unused components your org contains. It both highlights trouble spots and educates you on Salesforce’s recommendations for org cleanliness, giving you the information you need to keep your platform as clean and error-free as possible.
5. Utilize free Lightning readiness tools
Similarly, if your team is in the process of switching to Salesforce Lightning, numerous tools exist to help you with the transition:
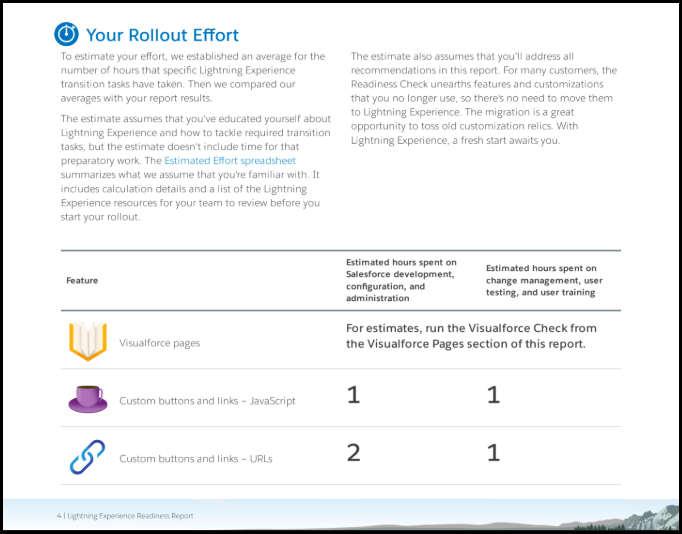
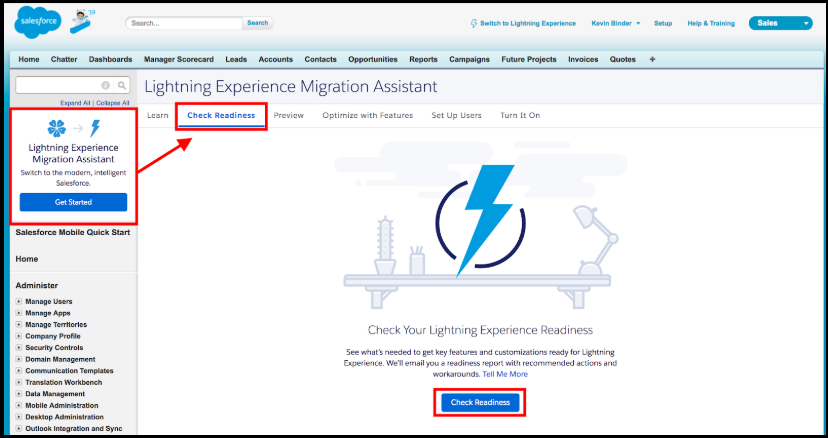
Lightning Readiness Report - Whether you’re just starting your switch to Lightning or in the thick of it, you may have difficulty knowing what will be different. What pages and components will come over? What won’t show up correctly? The Lightning Readiness Report can help there. Similar to the Optimizer report, it emails you a PDF highlighting parts of your org that may not work in Lightning — such as Visualforce pages, Classic sidebar components and Javascript buttons — so that you can better understand the hurdles you need to overcome before making the switch. Find it in the “Lightning Experience” section of the Setup menu, and run the report there to get started!
Find it in the “Lightning Experience” section of the Setup menu, and run the report there to get started!
Lightning Usage Dashboard - At some point during the switch, you’ll need to keep Classic and Lightning available to your users. And if you’re at that point, it can be difficult to know where users are in their personal transition. How many users live in Lightning? How often do they switch back to Classic?
Here, Salesforce has provided pre-built dashboards to help you find the answers. Look for “Lightning Usage” in the Lightning Setup menu. There, you’ll find a handful of helpful charts: the number of Lightning users by month, the number of people switching back to Classic each day, the number of switches by profile and more.

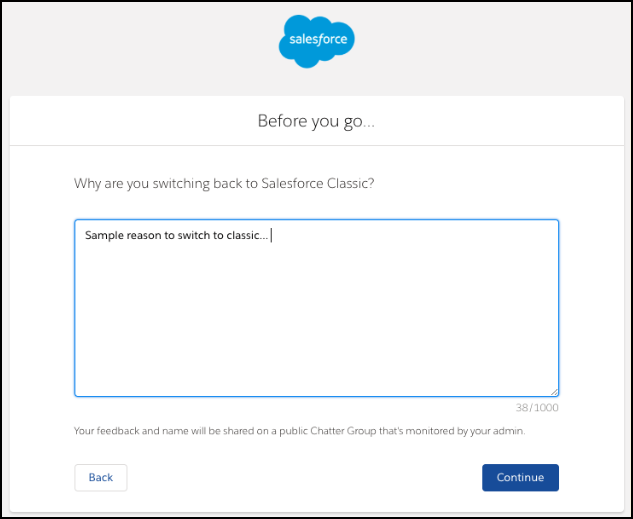
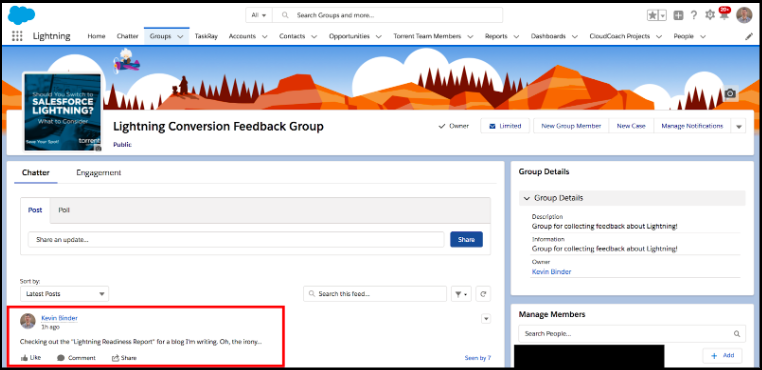
Ask Your Users Why They’re Switching to Classic - If you want even more data on why users are switching to Lightning, just ask them! Find the node for “Onboarding and Assistance” in the Lightning Setup menu (Lightning only) and enable the “Switch to Salesforce Classic User Feedback Form.” You can customize the question you ask users, set how often users are asked (every switch or only every few days) and designate the public Chatter group where Salesforce will post the answers.
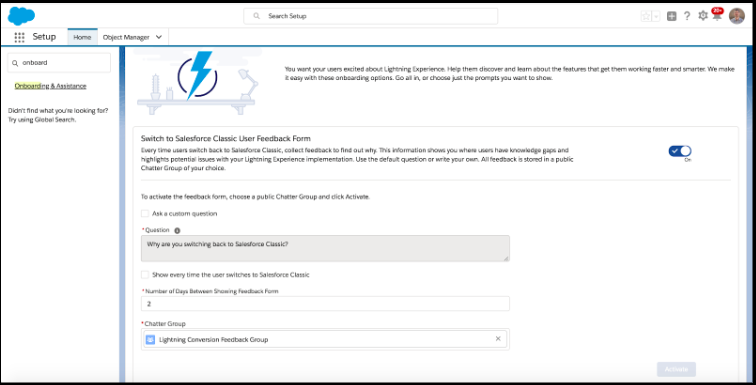
From there, Salesforce will prompt users to provide feedback on why they’re switching every time they go back to Classic. It’s a fantastic step for any admin trying to figure out what final steps remain in the transition.
So, at this point, you’ve seen 10 of our favorite free Salesforce features for admins. What are some of your favorites? Comment below so that we can share them with our community!
